28 December 2011

Window frames... take 2

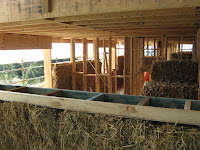
Fuzzy, AC and MOTH are hard at work finishing off the window and door frames with chickenwire.  All exposed wood must be covered by wire to ensure the render adheres, and frames finished to the right shape so the end result is asthetically pleasing to the eye.

Here are some before and after pics so you can see just how neat they are... the boys and girls are very proud of this... but some still require a bit of stuffing.
Before

After


Stuffing required


Fuzzy has also enjoyed "shaving" the walls...   
with a whipper snipper.


As you may already be able to tell (due to lack of updates), this phase of the project has been ridiculously time consuming! ... partly due to MOTH's (paid) work commitments.  It is vital that all the nooks and crannies are filled and secure before rendering begins.

Fingers crossed it won't be too long before we can render.

27 December 2011

R.I.P. Kimmi

It is with great sadness that we must tell you our dear Kimmi was put to sleep tonight.  She has had an awesome run of 19 years and was adored by her devoted family! 

Kimmi has been in renal failure for 8 months+ but it just all became too much for her.

We love you Kimmi...

26 November 2011

Pins and Needles...

Nama's brother / MOTH's uncle (UC) a very inventive bloke who, to date, has assisted us by engineering the internal stairs and creating the baling needles (see earlier posts);  UC has now cleverly concocted a contraption to simplify the making of pins... the images of which have now been removed as requested.

These pins are used to help keep chickenwire in place, specifically around the windows and doors, where most of AC's straw stuffed gaps are.
A pin


A bunch of pins ready to use


The pins are used in conjunction with the monster single-prong needle which ensures the chicken wire holds firm.


13 November 2011

AC Stuffs Everything...

... but in a good way!!!

Gaps of all sizes need to be filled with straw.  AC is a good stuffer!

Small hole needs stuffing
AC does a good job!


06 November 2011

The Poo Pipe...

After much too-ing and fro-ing, the Worm Farm Waste System is finally in place... not that there's much to show for it now it's 6 feet under!

It's a long tale of struggle (similar to many other aspects of building this house!) to get this waste treatment system in the ground.  Very early on in the project, we paid a deposit on the highly recommended Biolytix system which, many months later, literally went down the gurgler when they went into liquidation early 2011.  Upon further research, we chose to go with Worm Farm Waste Systems and they've been pretty fabulous to deal with so far.  The tank was delivered a few weeks back and initial works were carried out to dig the enormous hole required to "house" the tank.  Just as you'd expect, they hit a massive... and I mean a legendary monstrous rock they just couldn't work around.  It was then left to us to "remove" this rock... ha ha ha (and we thank our lucky stars that Fuzzy is switched on cos...) he nicely suggested they try digging to the left or right, considering there's a whole 5 acres of land to choose from.  Naturally it needs to be placed in the vicinity of the first dig, due to it's proximity to the house and fall of the land, but we figured there's plenty of options in a 5 metre radius, so why not try


Another element of the setup is to dig pipeline for the distribution of waste to the lower section of the block... an awesome job, but geez they made a huge mess in the process!


Fuzzy and MOTH thought they'd have a play-dig themselves to make sure we didn't waste any more of WFWS's time.  The eventual result was they broke the stump hole digger :( but ultimately felt their exploration was successful enough for the big guns to have another go a few metres to the side of the original dig.  Another go they did, and although I'm pretty sure the process was way more technical than what I'm about to describe, in a nutshell, the hole was dug, the tank got rolled down the hill, plonked in the hole and covered.  All in one day!


The end result is not all that exciting to look at, but us girls have put a bit of thought into this and decided to use what we now call "the poo pipe" and multi-skill it to become a flag pole too.  Foundation Day and an appropriate jingle is also in the making.

Meanwhile, Nama is tending to the garden... real back-breaking work!

13 October 2011

Window Frames ...

Bed4 & Boudoir (right)
 The door goes here... says MOTH, who's been hard at work with Fuzzy building the frames for all windows and doors.

BTW our fantabulous double-glazed windows have arrived in the country and are awaiting collection. 

We just need 2 coats of render before we can take delivery.

The boys have also connected the ring beam to the top boxing which adds strength to the structure - rather a symbiotic relationship really - house supports wall and vice versa.


It's also been necessary to do a bit of minor jacking to lift the saggy floor in
K1 and K2's area.

24 September 2011

Hay Hay, no more straw to lay...

Celebrations!!! 

The Master bedroom is complete
The last of the straw bales were laid today, all 7 of them... and it took all day to finish!  Much of the work was splitting and cutting baby bales to fit in awkward and bizarre spots.  But with relief, we can now say the walls are up and the real fun will begin as we get organized to render. 

We’d really love it if we could make it look as easy as last week’s Grand Designs episode about the Pommy family who built a straw bale house in rural France – ie. bang up the bales & blow on some murky lime render and… shazam, it’s all done.   

We, however, still have many jobs to do in preparation.  Watch out for future blogs about straw shaving, tossing sand on glued frame posts (a bit like Pro Hart), stitching chicken wire to sections of walls (the GD ep. touched on this riveting process) and then the big enchilada... rendering inside and out with a mixture of lime, sand and cement.
Exact measurements required


Making a "baby bale"


MOTH placing the final bale
Having just seen MOTH walk in the door with straw covering his clothes, it reminds me of how much we are all looking forward to the day we can work at the house and NOT end up covered in straw... and finding the stuff on one's body in places where straw really doesn't belong.
While MOTH was working above the ceiling beams today, I requested a pose of him “planking”, but this was the best he could do…  epic fail.

30 August 2011

Stairs...

Not alot of super stimulating stuff happening at the moment.  MOTH and Fuzzy are making slow and steady progress on the wall building front, with the help of AC on weekends.  Much of the main level is complete with all sections tensioned and wacked, and the upper level is well on the way.  We're hoping to be all done by next week ready for the next stage... filling in the gaps where bales can't go and preparing for installation of windows. Nama has been industrious with a broom and bagging all the loose straw that we'll use for stuffing those gaps.

However this week, we took delivery of metal frames that form some of the stairs.  Blood, sweat and tears went into assembling the stairs up to AC's penthouse, but we're thrilled with the result. The treads are only temporary, but we all agree they fit in beautifully and add a rustic feel to the house.


19 August 2011

The Wacker...

Continuing with the captivating tale of how straw bale walls are constructed, I'll now tell you all about "the Wacker".  Now the Wacker is an essential tool used in the process of straightening bales at the time of tensioning the straps, as mentioned in the previous post.  A fantastically unique and ingenious apparatus really this Wacker, fashioned by the one and only MOTH, especially for the purpose of wacking bales into position.

Here are some photos to help make it clearer for you...

The making of
All ready for action


see?  nice straight walls

This is how it works


MOTH and UK having to
re-work the raincoat
due to high winds.
Footnote:  Only the handle was store bought. All other pieces were hand-made using recycled resources lying around on the property.

PS: There is a possibility that MOTH might be re-named "MacGyver".

PPS: I'd really like to show you a pic of some sensational wacking that occured (involving K1), but only on request if you email in triplicate and use the password "spank"!

09 August 2011

The Boxing King...

Fuzzy, the Boxing King has been industriously building intermediate boxing that sits on top of each 4-bale high section of wall, specifically for the purpose of providing stability to the structure.  Boxing is topped with straw... ready for the next layer of bales.
Up we go

Fuzzy in action


A birds nest
 
All in place


Once intermediate boxing is in position, each section of wall is compressed by means of the strapping that's already in place, using a ratchet tool to tension the straps.  The tensioning process is repeated twice more after 12 hour intervals.  
Phew... they align!

Tension!?


4cm is significant.

A marked difference
after full compression.


03 August 2011

Splitting Bales with AC...

For those of you who are or may be interested in the nitty gritty, as promised, I'm now giving you a blow by blow description of how to split a straw bale... cos it stands to reason that the perfectly sized 950x450x400mm bale just won't fit into every space.  derr
 
1. Gather all necessary tools...
Note the bale is held together
by pink baling twine.

2. measure where the bale needs
to be split and insert the
double-pronged baling needle.


4. remove the needle while
pulling the twine through.

3. thread 2m lengths of
blue baling twine through
the eyes of the needle.


5. find threads from opposite
sides of bale and tie firmly.

  
6. cut the pink baling twine...


8. repeat process as required

7. and shazam...
the bale splits in two.

9. and put into position.
  
PS: goodness me,
can this be,
straw balers disease!?